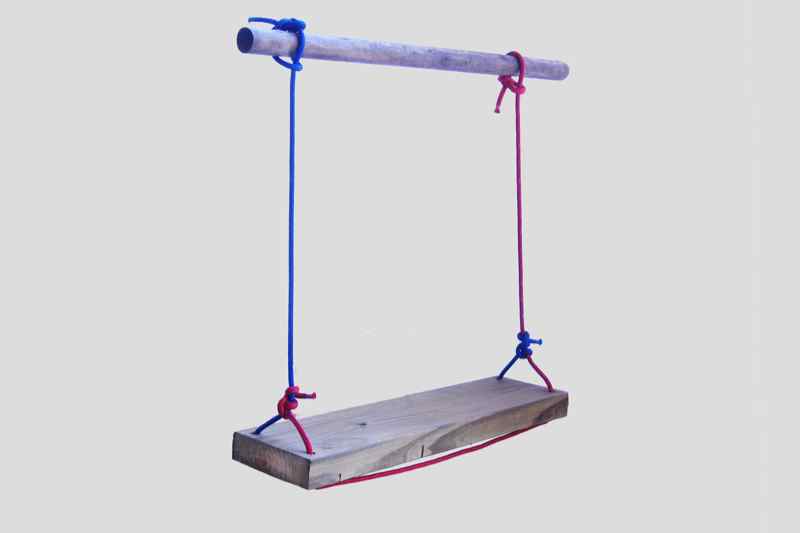
Shows how to tie knots to support a swing.
Tree Swing
Shows how to tie knots to support a swing.
 |  |

 |  |  |  |  |
To Step use Arrow Keys (
Uses: As usual, Ashley covers the options for supporting seats and hanging a Swing in detail (ABOK # 3828 – 33, p 590). The techniques described here are based on his ideas with some modifications.
The Seat: The wood used for the seat may be exposed to sun, rain, wind, and frost. It is likely to deteriorate long before good rope. Also, your swing will be used unsupervised – despite the rules that you make! In this design the ropes may be untied so that the seat may be taken off; and for safety the rope passes under the seat in case the seat breaks.
The Rope: A Swing made with appropriate rope may still be hanging in place decades after being installed (ours lasted at least three decades). However, rope sold in the hardware store often has little or no protection from UV light and may fail much sooner. If possible buy marine quality, UV protected rope. It will outlast your children and may outlast theirs too! Rope is absurdly strong for this application. Nevertheless, buy thick rope for the pleasure and comfort of holding it. 1/2″ – 5/8″ (12 – 15 mm) is suggested.
Attaching the Main Ropes Above: A high porch may allow a Swing to be suspended from screw eyes secured into beams in the ceiling above. If so, a Bowline tied into each ring will serve well. Ideally find a tree. The perfect tree would have a strong, precisely horizontal branch reaching far enough away from the trunk to minimize the risk of collisions. Such trees are few! If you are lucky enough to find a suitable tree you may have to resort to throwing a weighted string over the branch (which is what we did at the family home in Aldeburgh, Suffolk, England). Then use the string to pull the main rope over.
Separation: The ropes at the top are best separated from each other – say by double the width of the seat. This improves the behavior of the Swing – making it far more likely to swing in the intended direction. This separation depends on the length of the ropes and should be less with short ropes and wider for longer ropes.
Knotting the Main Rope: The practical knot here is a Bowline with the other end then threaded through the loop – to form the Running Bowline. Pulling then results in the bowline sliding up until the rope snugly embraces the branch. Sadly this results in an excess length of rope that has to be discarded. To reduce wastage, pull the two main ropes over in sequence. If the branch is 20 feet above the ground, start with about 60 feet. When the first rope is in place, leave a couple of feet lying on the ground to allow for the final threading and knotting. Cut off the remainder and use it to repeat the process to make the second rope.
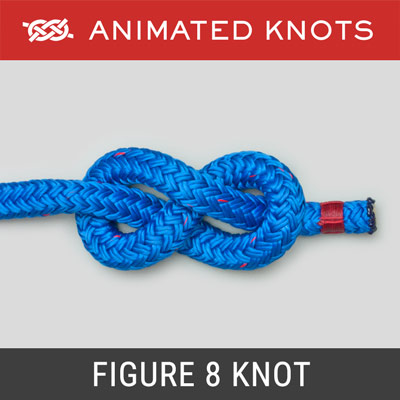
Rope Under the Seat: The two ropes are threaded down through holes diagonally opposite each other, then along under the long edge, and back up at the opposite end. This design ensures that if the wood becomes rotten both ropes will be under the child to provide support. In practice one rope is threaded and then secured temporarily with a Figure 8 knot. This allows the other rope to be threaded and tied.
Joining Each End to the Other Rope: Each tail is attached to the opposite rope with three Half Hitches. As shown in the animation, these knots are tied fairly close to the seat to make a symmetrical triangle just above the main rope. This design ensures there is little tendency for the seat to slip or tilt.
Options: Unless you are using very slippery rope, you can tie a Rolling Hitch each side well above the seat. The height of the Swing seat may then be adjusted easily by sliding them, which is more convenient than untying and tying the three Half Hitches. The penalty is that the seat may tilt more easily.


